
It was a very quick project and I figured out how to assemble it as I went. I'm sure there are tutorials out there to show you how to make one, but I thought I might as well make one as well. I made my banner with scrap fabric I bought and I even upcycled some fabric from a vintage pillowcase. Well, here it is! I hope you find it comprehensible to read and make. If you have any questions or want to share your success with me, please feel free to email me!
(Also, I'm sorry that this is later than I said/planned. I've been preparing everyday for this craft fair. I've been staying up until 3 a.m. every night! This craft fair is a pretty deal for me.)
How To Make A Pennant Banner w/ Scrap Fabric
Supplies:
Scrap fabric
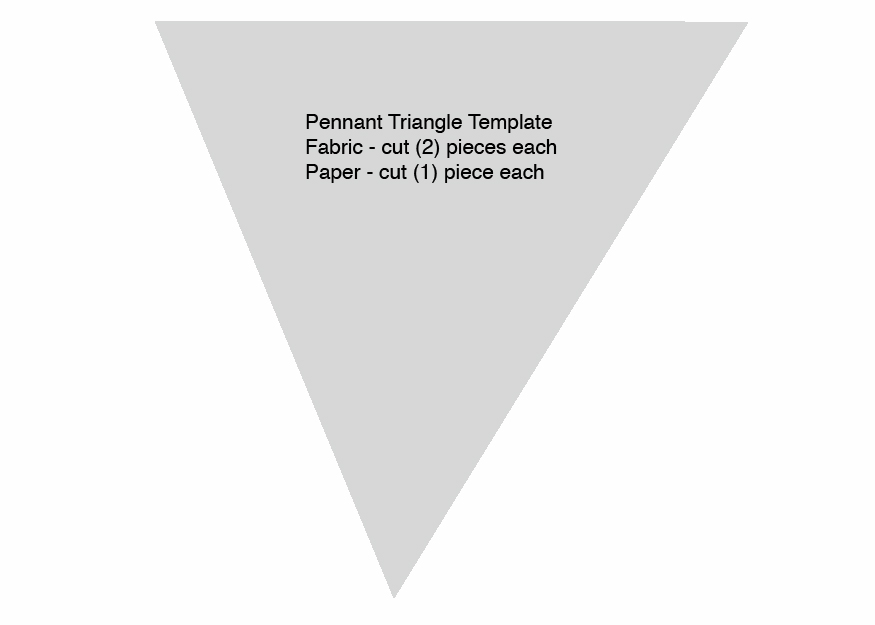
Pennant template
Thread
Packet of bias tape (I actually used a wide band of fabric I took off of an old pillowcase. I cut it in half length-wise and sewed the long thin strips together [it was already folded for me] and it measured to be [folded] 1" wide x 82" long.)
Sewing machine
Scissors - one large pair and one small pair (for the small I used my embroidery scissors)
Straight pins
Chopstick or pencil
Hot iron
Estimated amount of time for project:
1 - 1.5 hours
Step One:
Download the pennant template that I have provided or make your own if you wish. Pin triangle shape to your scrap fabric and cut two pieces (of the same or contrasting fabrics) for each pennant. My triangle template does not include a seam allowance, so make sure to cut at least 1/2" seams.
You can cut and sew as you go or you can cut out all of your pennant pieces first and then sew. It's faster to finish the project if you do the latter. I made 12 pennants, so that means 24 triangles.
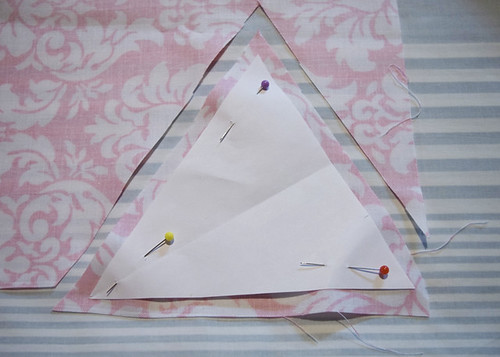
Step Duex:
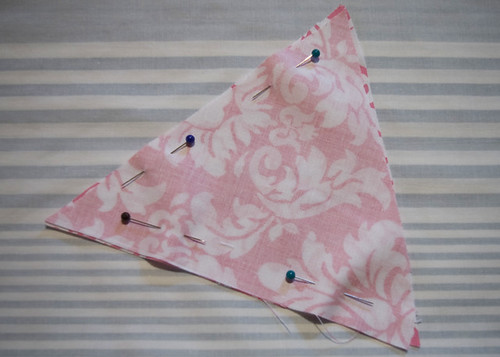
Pin fabric right sides together and then sew them suckers! Remember I cut the fabric with the 1/2" seams so either sew 1/2" or 5/8" seams on the two longest sides (a.k.a. the bottom) of the triangles. I lined up my fabric with the edge of the sewing foot for the seams for easy measure.
Step Tree:

Iron open the seams flat. Don't worry about ironing from tip to tip. You just want most of the seams ironed by the wide end (a.k.a. the top) of the pennant shape.
Step Quatre:
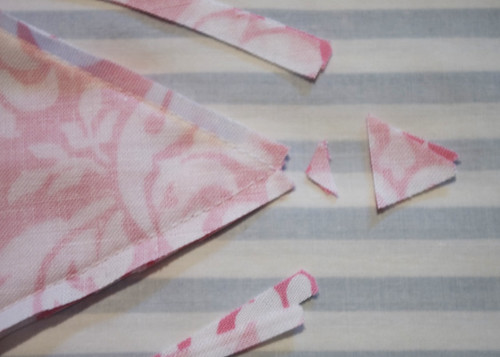
Snip the corner and then cut a triangle at the tip of the pennant. Be careful to not cut the thread! Then trim off about half of the seam allowance. This is so when the pennant is turned out it will lay nice and flat! It's very important that you iron open the seams before trimming them. I forgot to a couple times and it got a little tricky to get them to lay flat without the danger of potentially burning myself.
Step Cinco:
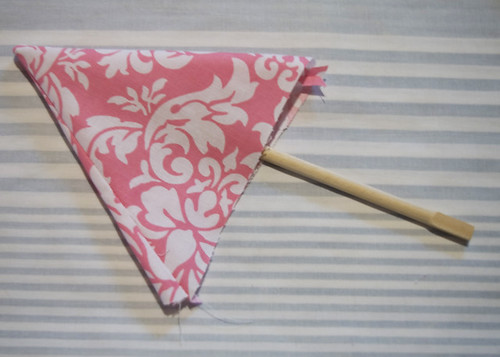
Turn pennant right sides out and use your handy chopstick (or pencil) to push the point, so then it can be extra pointy instead of bleh. Then iron pennant flat.
Step Six:
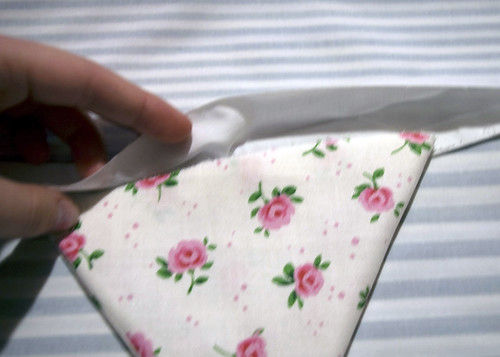
With all of your finished pennants, place them on your strip to according to how you like. I put 1" spacing between each pennant and about 2" from each end of the folded strip. Then sandwich (about 1/2" of the top) your pennants between the strip/bias tape and pin in place.
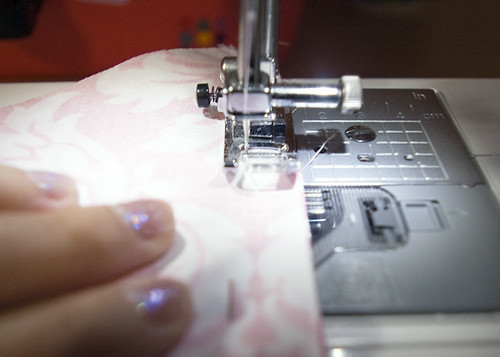
Step Sieben:
Now it's time to finish sewing! Use a straight stitch or zig zag (whichever to your liking) to attach it to the bias tape.
Step Eight:
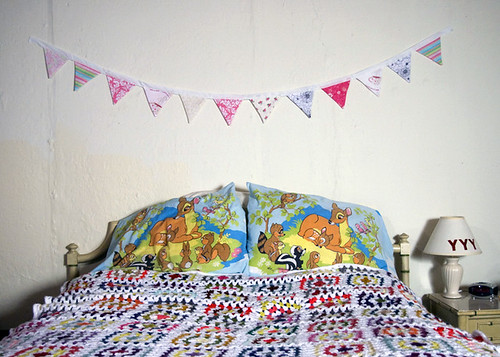
Snip any loose threads and iron again to make all of the pennants nice and flat. Now you can hang it up anywhere!
I know that the pennant banner that I made could be used for Valentine's Day, Mother's Day, Easter, or even a birthday. Think of all the combinations you could make with your scrap fabrics. You could make a pennant banner for every occasion for cheap! Now to make a banner with paper is just like how to make it with fabric, but it takes fewer steps and it's quicker.
How to Make a Pennant Banner w/ Paper
Supplies:
Scrapbook Paper, construction paper, or whatever you have on hand
Bias tape
Scissors
Pennant Template
Thread
Sewing Machine
Step Uno:
Use the pennant template I provided (or use your own shape) and trace onto the paper of your choice and cut. You only need to cut one each, so if you have two-sided paper you can many options with fewer pieces of paper, but if it's one-sided that's fine. You don't need to cut two pieces each for each pennant, like with the fabric tutorial.
Step 2:
Arrange the triangles on the bias tape according to how you want and then sandwich in between the bias tape and pin (if it's not too thick).
Step Troi:
Zig zag stitch (at a wide stitch setting) the triangles to the bias tape and sew slow. Use an older/dull needle if you have to. Then you're done and ready to hang!
Note: Instead of sewing the paper pennants to the bias tape I'm sure you could glue or use double-sided tape. Though, I think sewing may be stronger. I'm not knowledgeable about glues and scrapbooking adhesives (well scrapbooking in general), but if anyone knows a good substitution for sewing, please let me know!
Show me pictures if you make a banner, please!
<3 J.Loo
That's awesome. If you have the patience to make this, you can definitely knit a sweater:) I'm just getting started with sewing and my machine is in an uninspiring unfinished basement so I really lack motivation.
ReplyDeleteYeah, but wouldn't knitting a sweater take longer? One day I'll try, I just have to be more confident in knitting.
ReplyDeleteI am so appreciating your post right now. I'm not a great sewer but I'm giving it a shot since you directions are so clear. Thanks!!
ReplyDeleteOh I so hope it turns out beautifully! Show me pictures if you get the chance.
ReplyDeleteThanks for writing these directions! I'll be making one of these with appliqued letters for my daughter's nursery. I'm so excited. :)
ReplyDelete